Exporting products from your Shopify store to a CSV file is a straightforward process with the help of Store Manager for Shopify software. Whether you’re backing up product information, migrating to another platform, or analyzing your inventory, this guide will walk you through the essential steps to ensure a smooth export process.
Step 1: Select Shopify Products for Export
The first step is to determine which products you want to export. Store Manager for Shopify allows you to:
- Export all products in your store.
- Export only selected products. Use filters or manually select specific products.
Step 2: Launch the Export Wizard
Once you’ve selected the products for export, launch the Export Wizard. You can do this in two ways: by clicking the “Export” button located on the toolbar or by right-clicking on the selected products and choosing the corresponding option from the context menu.
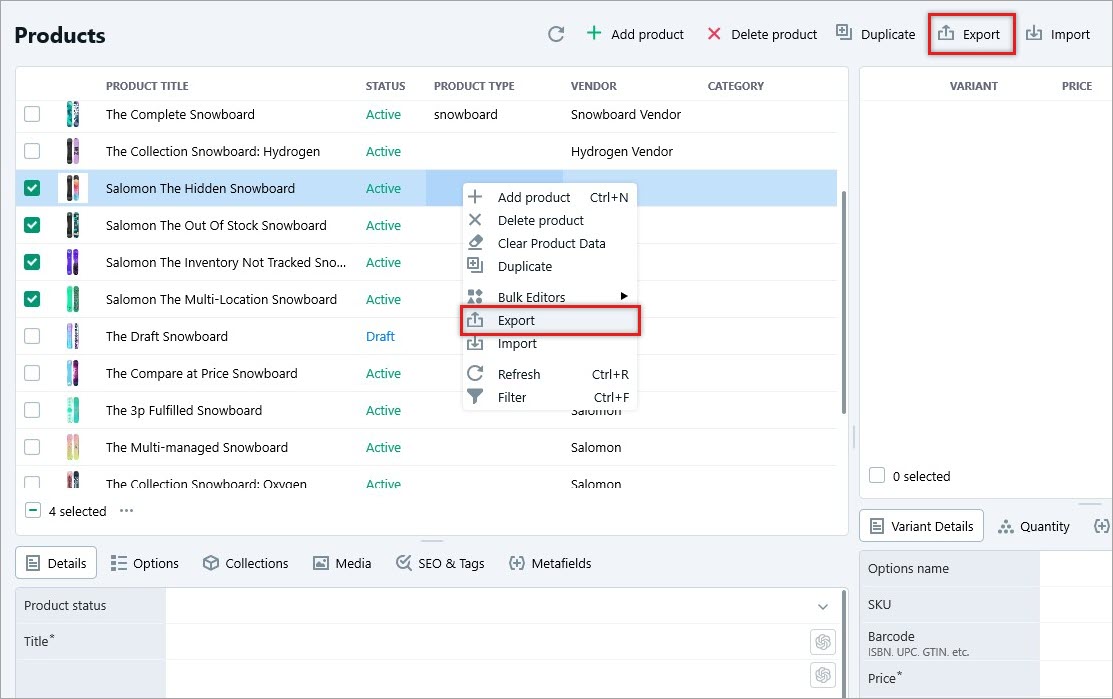
The Export Wizard will guide you through the rest of the process.
Step 3: Choose Export Scope
In the Wizard, you’ll be prompted to choose between two options:
- Export All Products: This includes every product in your Shopify store.
- Export Selected Products: This option exports only the products you chose initially.
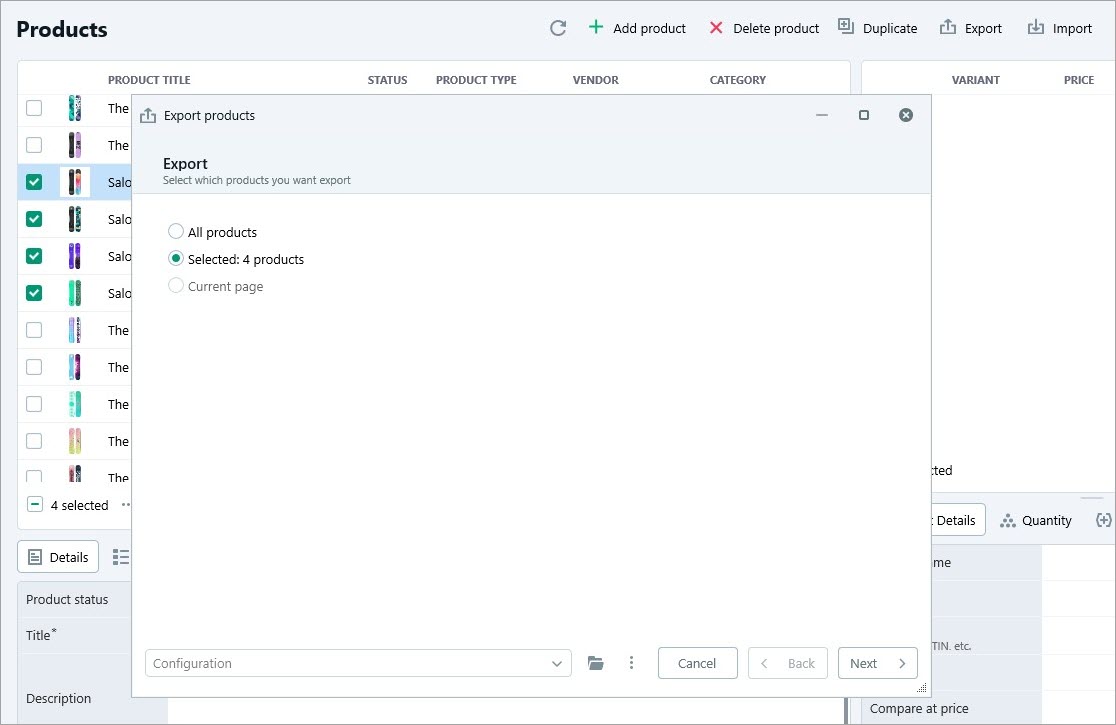
Make your selection and click “Next” to proceed.
Step 4: Specify Product Fields for Export
Next, you’ll need to decide which product fields to include in the CSV export file. Examples of available fields include general, category, SEO, images, metafields, options, variants, and inventory product details.
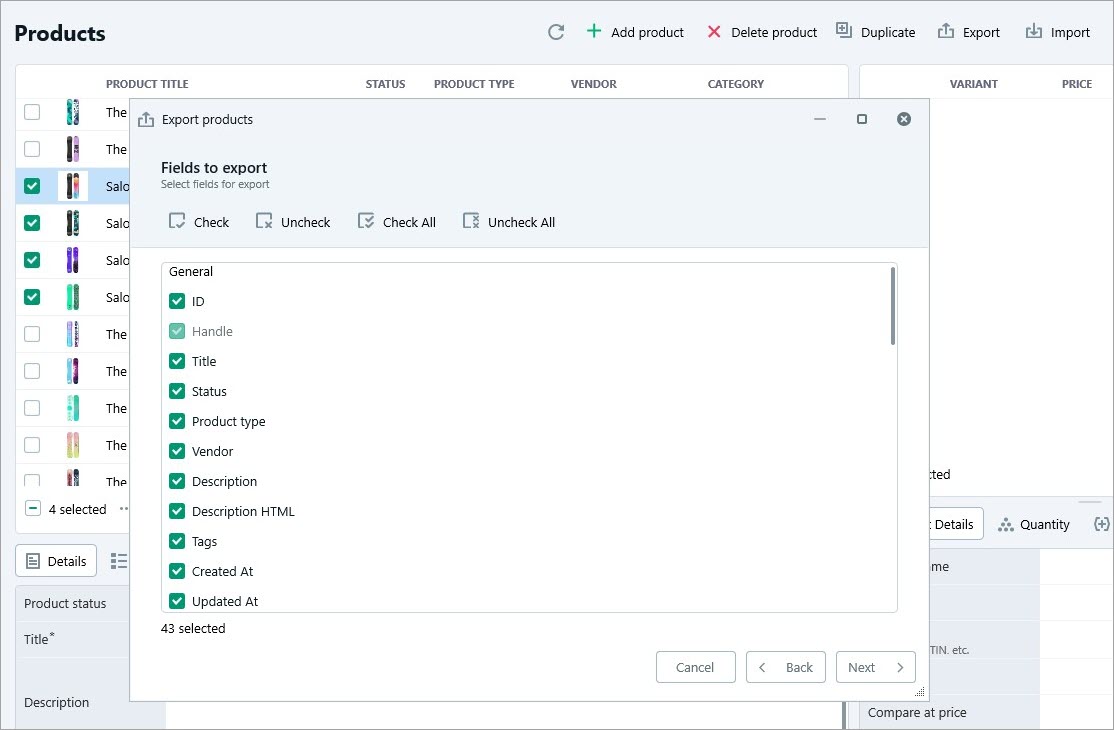
Check the boxes for the fields you want to include.
Step 5: Configure Export File Settings
This step involves setting up the export file. You’ll need to:
- Choose a File Format: CSV in our case.
- Specify a File Name and Location: Enter a name for the export file and choose where it should be saved.
- Set Delimiters: If exporting to a CSV or TXT file, define the delimiters (e.g., commas, semicolons, or tabs) to separate data fields.
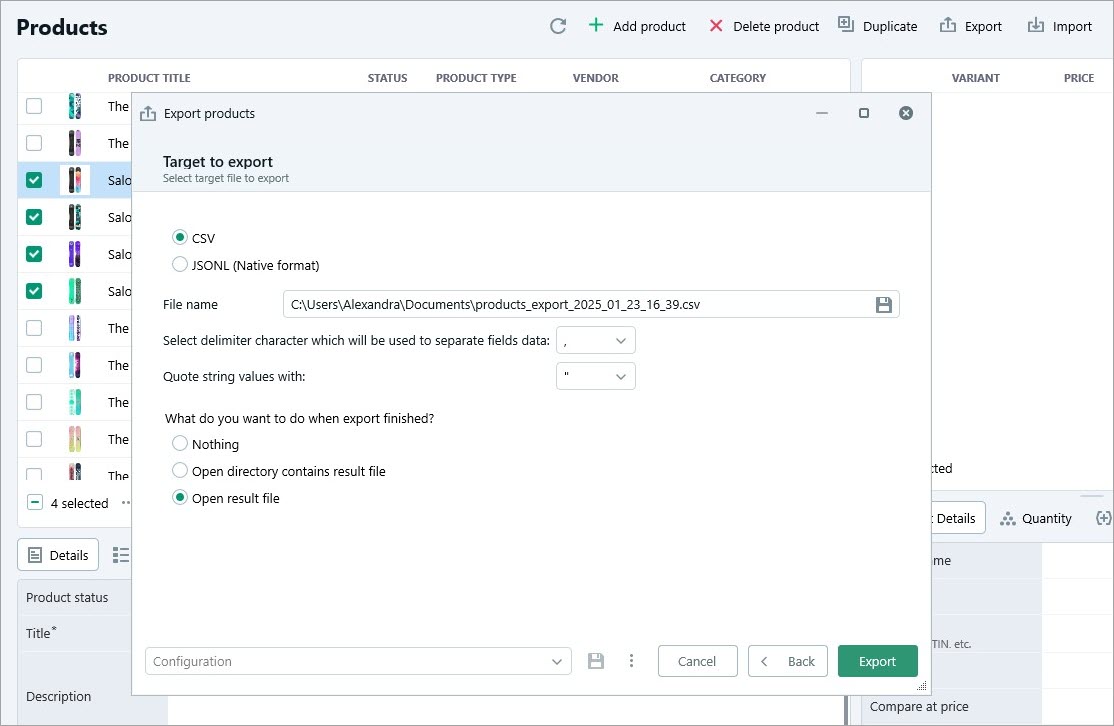
You’ll also have the option to specify what happens after the export is complete: open the exported file immediately, open the directory containing the file, or do nothing.
Make your selections and click “Export” to finish the process.
That’s it! The CSV file is ready.
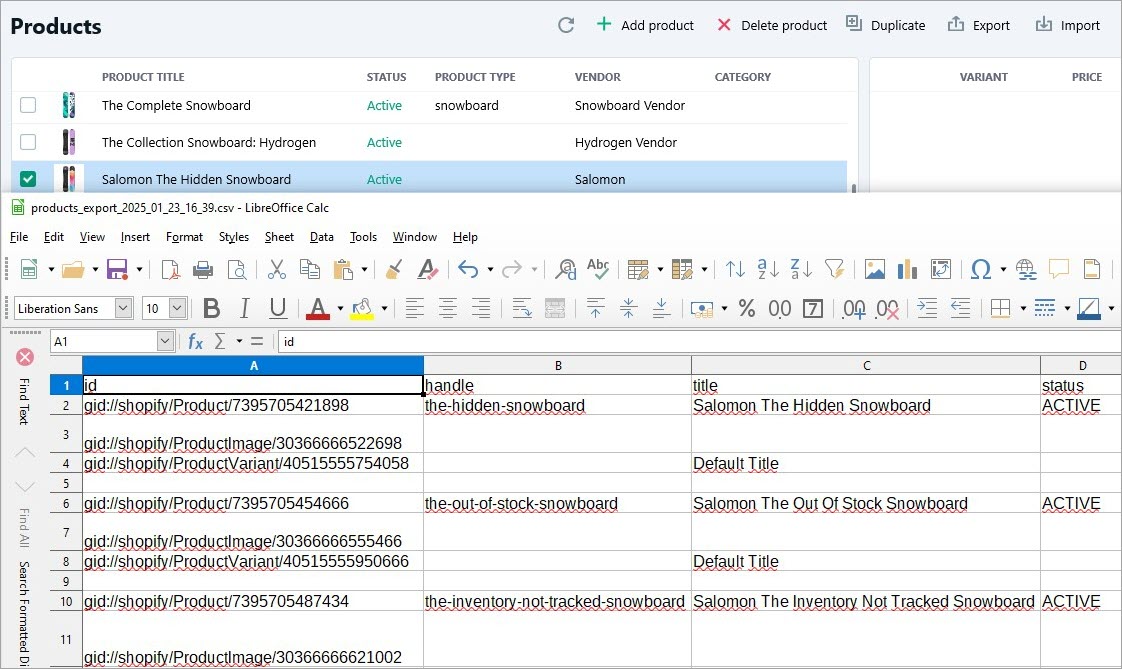
Exporting Shopify products to a CSV file using Store Manager for Shopify is an intuitive and efficient process. By following these steps, you can quickly generate an export file tailored to your specific needs. Whether you’re maintaining records or sharing data, the Export Wizard simplifies the process, saving you time and effort. With this tool, managing your Shopify store’s product data becomes a seamless experience.
Take advantage of the free 14-days trial to explore the full functionality of the software. Test out the Shopify Product Export to CSV and experience how much time you can save managing your store.


